Level Design
In this tutorial we will learn how to design levels for our environments. In GDY, Levels are built entirely using level strings. A level string contains characters divided by spaces, each different character corresponds to a different object in the environment. The characters that are used to place each object are configurable.

A level string describing 4 different types of objects. Pentagons p, triangles t, circles c and hexagons h.
Numbers after characters refer to the player that owns this object.
Basic Level Strings
Object Ownership
Stacking Objects
Defining Multi-Agent Levels
Player Highlighting
Level String Basics
Every level has an associated level_string which defines the map of all the objects in that level. Level strings are a list of strings that make up a 2D coordinate mapping of the level.
The list of strings is separated by a newline \\n character denoting a change in y coordinate. Within each string in the list, each character (ignoring whitespace and special characters) denotes a new object.
This explanation becomes much simpler with an example:
p   p   p   p   p   p   p   p
p   .   .   .   .   .   .   p
p   .   h   .   .   .   .   p
p   .   .   .   .   c   .   p
p   .   .   .   .   .   .   p
p   .   .   .   .   .   .   p
p   .   c   .   .   .   .   p
p   .   .   .   .   .   .   p
p   p   p   p   p   p   p   p
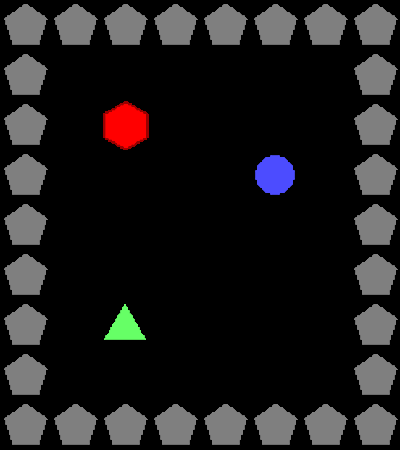
This level string defines an empty room, where the walls are made up of p objects there are c and h objects in the room. The Map Characters p, c and h are associated with objects in the GDY.
Object Map Chacters
- Name: hexagon
 MapCharacter: h
 Observers:
   Block2D:
     - Shape: hexagon
       Color: [1,0,0]
       Scale: 1.0

- Name: circle
  MapCharacter: c
  Observers:
    Block2D:
      - Shape: circle
        Color: [0.3,0.3,1]

- Name: pentagon
  MapCharacter: p
  Observers:
    Block2D:
      - Shape: pentagon
        Color: [0.5,0.5,0.5]
The MapCharacter in the object definitions tells Griddly which object to place in the each level when it is created.
In this case the wall (p) of the room will be the pentagon object, the c object a circle and finally the h object is a hexagon.
the . characters denote that there are no objects in that location. The number of spaces between each object does not matter (they are ignored).
When rendered… this environment looks like this:
Object Ownership
Lets’s say we have an environment we want to build where we need to associate rewards with certain objects, but these objects are never interacted with by the player… For example maybe the object will disappear after a certain amount of time and the avatar loses a reward…
For this purpose we can define objects in the map as owned by a player. We can do this by adding a number after the map character:
p   p   p   p   p   p   p   p
p   .   .   .   .   .   t   p
p   .   c1  .   .   h1  .   p
p   .   .   .   .   .   .   p
p   .   .   t   .   .   .   p
p   .   .   .   .   .   .   p
p   .   c2  .   .   h2  .   p
p   .   .   t   .   .   .   p
p   p   p   p   p   p   p   p
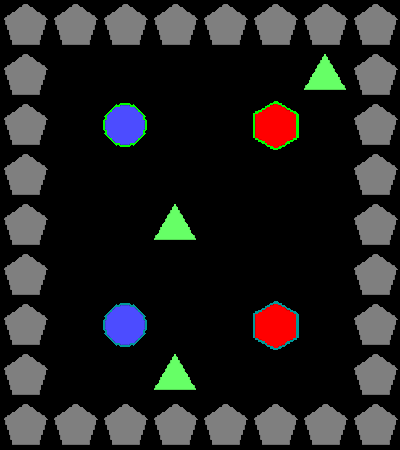
In this map, the c and h objects are owned by different agents t and p objects are not owned by any.
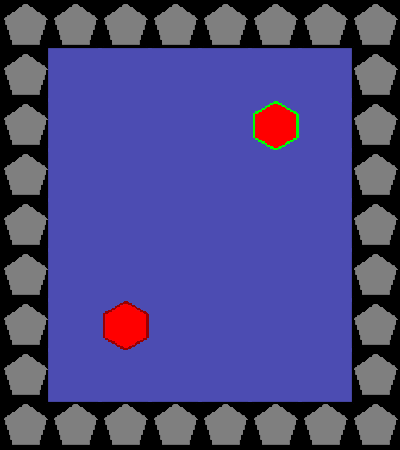
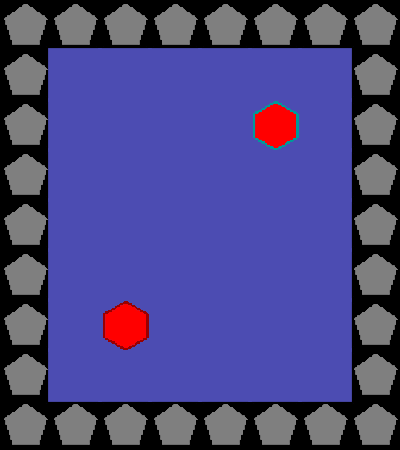
Multi-Agent perspectives
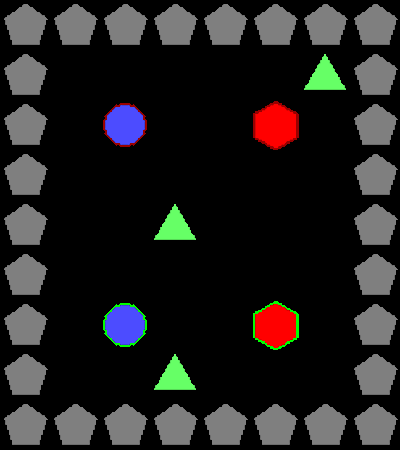
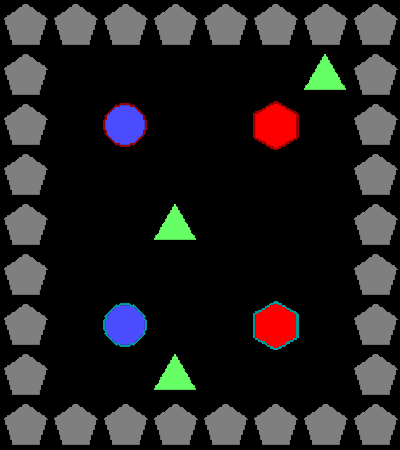
In multi-agent environments, the perspective of the agent is always changed so that each agent sees itself as “player 1”. This is handled in all observer types.
For example in the Block2D observer each agent will see it’s own objects with green highlighting:
Agent Perspective |
1 |
2 |
Global |
|---|---|---|---|
Image |
|
|
|
Layering Objects
If we have more complex environments for example where different rooms may have different types of background or floors, or where objects may start on top of other objects, we can use the / character to define that an object is on top of another object.
p    p    p    p    p    p    p    p
p    s    s    s    s    s    s    p
p    s    s    s    s    h2/s s    p
p    s    s    s    s    s    s    p
p    s    s    s    s    s    s    p
p    s    s    s    s    s    s    p
p    s    h1/s s    s    s    s    p
p    s    s    s    s    s    s    p
p    p    p    p    p    p    p    p
It’s also very important to define the ordering of the objects in the Z axis in the GDY. This makes sure that behaviours happen in the same priority order as they are rendered.
For example with the square s and h objects, we define them to have Z values of 2 and 1 respectively:
- Name: square
  Z: 1
  MapCharacter: s
  Observers:
    Block2D:
      - Shape: square
        Color: [0.3,0.3,0.7]
        Scale: 1.5

- Name: hexagon
  MapCharacter: h
  Z: 2
  Observers:
    Block2D:
      - Shape: hexagon
        Color: [1,0,0]
        Scale: 1.0
When rendered the hexagon objects are always rendered on top of the square objects.
Agent Perspective |
1 |
2 |
Global |
|---|---|---|---|
Image |

|
|
|
See also
we show another example of this in the stochasticity tutorial.
Defining Levels Programmatically
If we don’t want environments with fixed maps, we can also generate maps programmatically using any algorithm we choose. There’s only two simple steps to this:
Generate the level string
Pass the level string to the
env.resetfunction.
level_string = \
""". c c c c c c . . c c c c c c . . c c . c c c c c c . . c c c c c c . . c c . . . . . . c c . . . . c c .
c c . . . . . . . c c . . . c c . c c . c c . . . c c . c c . . . c c . c c . . . . . . . c c . . c c . .
c c . . . c c c . c c c c c c . . c c . c c . . . c c . c c . . . c c . c c . . . . . . . . c c c c . . .
c c . . . . c c . c c . . . c c . c c . c c . . . c c . c c . . . c c . c c . . . . . . . . . c c . . . .
. c c c c c c . . c c . . . c c . c c . c c c c c c . . c c c c c c . . c c c c c c c . . . . c c . . . .
"""
env.reset(level_string=level_string)
This gives us a level that looks like this:

We build an environment that spells out “GRIDDLY” by rendering ascii art as an environment!
See also
If you want to know more about procedural content generation in Griddly, there’s some documentation on it here